HubSpot
Use Meshes to add contacts to HubSpot lists and update HubSpot contact properties from product events.
Use the HubSpot integration when Meshes should react to product events by updating HubSpot lists or contact properties. In a Meshes workspace, you create the HubSpot connection, build a rule for the event you care about, and map the fields HubSpot should receive.
Supported actions
- Add to List adds the contact to a selected HubSpot list.
- Remove from List removes the contact from a selected HubSpot list.
- Update Property sets a HubSpot contact property to a selected value.
Create the connection
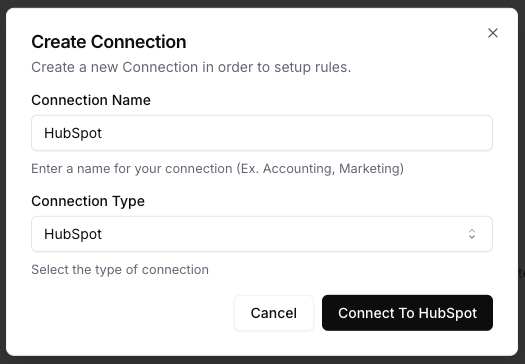
- Open Connections in your Meshes workspace.
- Click New Connection.
- Select HubSpot.
- Give the connection a name your team will recognize.
- Click Connect to HubSpot and complete the OAuth flow.
After authorization, Meshes loads the HubSpot lists and contact properties available to that account so you can use them in rules.
Create a rule
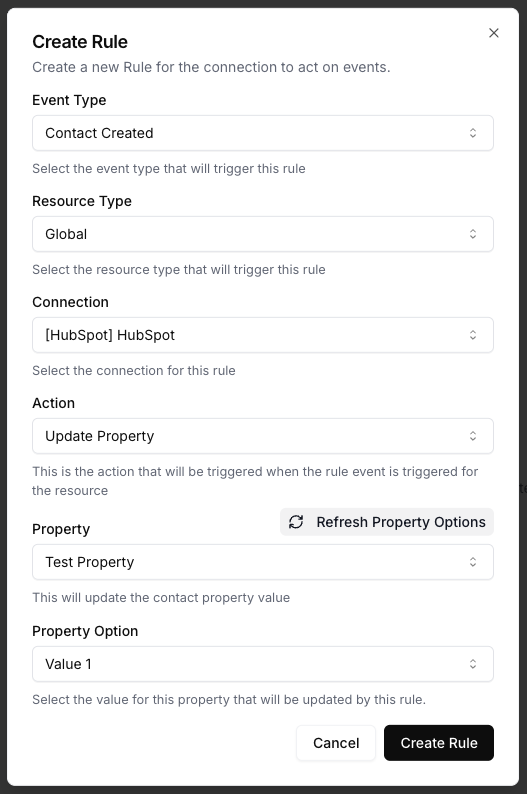
- Open Rules and click New Rule.
- Select the event type that should trigger the HubSpot action, such as
user.signuportrial.started. - Select the resource type for that event.
- Choose your HubSpot connection.
- Select the action:
- Add to List or Remove from List requires a HubSpot list.
- Update Property requires a HubSpot property and one of its allowed values.
- Map the event fields Meshes should send to HubSpot.
- Save the rule.
Send a test event
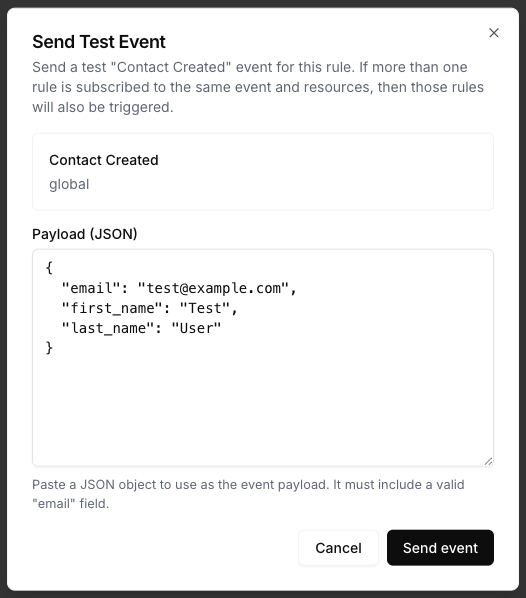
Use Send Test Event on the rule to confirm the action and mappings.
{
  "email": "test@example.com",
  "first_name": "Test",
  "last_name": "User",
  "plan": "growth"
}
For HubSpot rules, include the source fields your rule mapping expects. In most cases that means email plus any lifecycle or profile fields you plan to map into HubSpot.
Review results
After the event runs, open Events and inspect the rule delivery details. Meshes shows whether the HubSpot action completed, what rule ran, and any retries or failures.
Notes
- Map
emailat minimum for HubSpot contact actions. - HubSpot lists and contact properties are loaded from the connected account.
- Update Property only exposes values Meshes can select from the live HubSpot property definition.